
Here’s little explanation of how the sprite trick in my latest picture for c64 works.
Please find the video at the end of this post where I explain my workflow.
First of all let me say that the workflow may look like overcomplicated at first and there are some limitation but I’m pretty confident that this approach (or call it mode) has huge potential.
Take a look at the images bellow to get the idea. I’ll try to explain the way I understand it works. Remeber I’m not the coder 😉 all credit for this routine goes to Knut of Fossil (C64 demogroup).
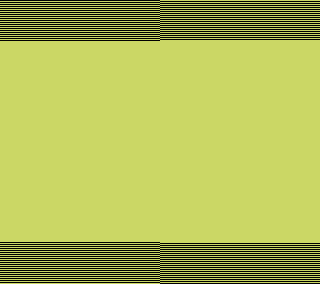
- The background color is yellow ($07). It is important decision to do at the beginning as it will be a dominant color in the line dithering on the top/bottom borders
- Final picture size is 160 x 284 pixels (fat 2×1 pixels)
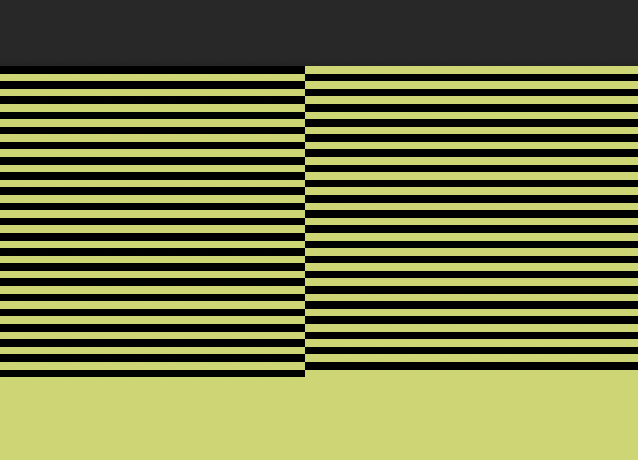
- Image #2 is a closeup to the split that is made after first 80 pixels
- sprites on the borders are not expanded, and they can have 3 colors – the same colors for top and bottom part of the picture
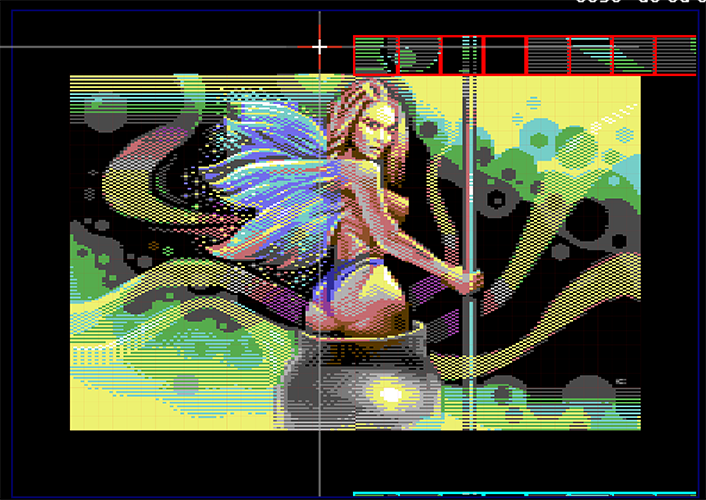
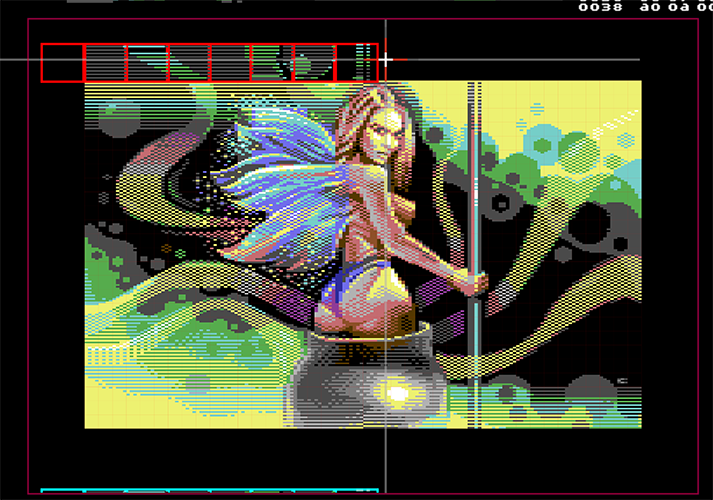
- there can be only 8 sprites in one scanline so the sprites are drawn in the even / odd order as seen on images #3 and #4
- the image in the middle is normal C64 multicolor image
- the advantage of this approach is that a pixel-artist doesn’t have to plan carefully for sprite use on the borders. as whole 160×42 pixels areas at top and bottom can be utilized.
- disadvantage is the scan-lines effect and the split. The split specifically can be very annoying, but I’m sure there are use cases that it won’t be seen that much
- the sprites part can be created as a .png file (I did that in Photoshop) in 4 colors as the image bellow shows
10. the sprite conversion is done by the KickAssembler script (program) that creates the final executable .prg file for C64.
Check the short video below for more explanation about my workflow and a spoiler on my next image ;). Enjoy